How to Remove a Bathroom Vanity
Published by Nanni on Friday, August 31, 2012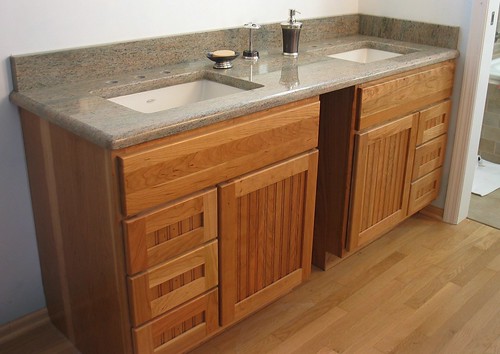
Photo credit by chaim zvi
One of the simplest aspects of remodeling a bathroom is the removal of the existing vanity sink. The process to remove a bathroom vanity involves very few tools and just a few easy steps. All the tools required are a pipe wrench, screwdriver, utility knife and small bucket. Unlike bathtubs or commodes, removing the bathroom vanity does not require working with the plumbing. A job like removing a bathroom vanity can usually be completed in a half-hour or so.
The first thing you will do to remove a bathroom vanity is to reach under the sink and tighten the two water valves to the "off" position. After assuring yourself that the water supply is cut off, open the faucets to release any pressurized water in the upper lines. For the next step in removing a bathroom vanity, you will want to have a small bucket under the sink. You will first undo the waterline leading to the vanity faucets where they join in to the shutoff valve. You will next work loose the elbow joint in the drainpipes leading out of the sink. Be very careful to not spill trapped water onto the floor from this pipe.
Now that you have freed the vanity from its plumbing connections, it is time to begin working on removing the bathroom vanity sink top. Using a sharp utility knife, use a long steady stroke to begin cutting through the caulk that holds the countertop to the wall. If the caulk line extends down the side of the sink top, you will also need to cut this loose. After the bathroom vanity counter top has been freed, lift it straight up and away from the lower cabinet. Bathroom vanity sink countertops can be rather heavy. If yours is very large you may want to have help lifting it away from the cabinet structure.
With the countertop removed, you will now begin the process of removing the cabinet of the bathroom vanity. On the back of the cabinet will be one or two sets of screws holding the cabinet to the studs in the wall behind the vanity. These will need to be unscrewed. Now, if you are going to be reinstalling a new bathroom vanity, you will want to be careful and make sure that the location of the support studs in the wall are marked. Being careful not to hit the incoming water lines, remove the cabinet from its location, and take it from the bathroom area.
The process can take either of two directions at this point. If you are reinstalling a new vanity or sink that is the same size or larger, you are ready to begin the new project. However, a smaller vanity cabinet or sink arrangement would show any rough spots in the wall from the removal of the old bathroom vanity. The final step in removing a bathroom vanity would be to repair the wall that was behind it. The method of doing this will depend upon what type of wall you have in your bathroom.
 | Posted in »

0 comments: Responses to “ How to Remove a Bathroom Vanity ”