How to Install Crown Molding
Published by Nanni on Wednesday, July 11, 2012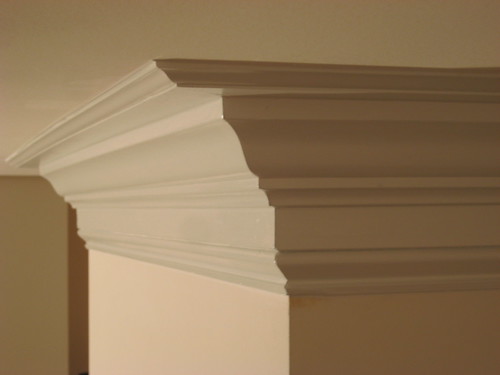
Photo credit by Crown Molding
When properly installed, the crown molding on the upper part of a wall as it joins the ceiling can add a touch of elegance to the overall appearance of your decor. As trim, the crown molding provides both a defining line for the room elements and a visual buffer to hide the actual structural joints. Properly installed crown molding does not lay flat against the wall, but instead forms a triangle with the wall and ceiling. This does create a bit of difficulty with achieving a proper cut on pieces that join at a corner. It involves cutting the wood trim not only along the miter angle but a bevel angle as well.
The first step in how to install crown molding is to measure the length of the area to be trimmed. As a practical safety measure, you will want to add a 10% surplus for wastage and odd cutting lengths. Next, pick the style and design of the molding that you feel best suits your tastes and the decor. The color and design cuts come in hundreds of forms although most crown molding is only produced with wood or plastic. While more natural, the long strips of wood trim crown molding does have a greater potential to warp. Next, you will have to paint or stain all the new molding you are about to install. By doing so at one time, you are best assured of having a uniform coloration of all the trim.
Next comes the start of the actual attachment. Determine the top and bottom of your molding. In classic design, the shorter curves of the mold design go toward the bottom against the wall and the longer, shallower curve flows up toward the ceiling. Begin work in a corner where two pieces of crown molding wil come together. The miter saw was developed to make this easier. You will calculate the angle of the miter cut and the degree of beveling required to have the two pieces join snugly and smoothly together. It may require the careful use of a utility knife to fine-tune the surface to be joined. Always create the two corner pieces together as you work along the room.
In long rooms, make sure to measure so that the joins of each straight section of crown molding center over a wall stud. This makes a more stable location to hold the ends firmly together for minimum notice of the join. You will want to locate all the wall studs as they are where you will use a drill to make pilot holes for the nails. This prevents the molding from being splintered by hammer blows. Most molding is held in place by 6d or 8d finishing nails. Use the minimum number of nails necessary to hold the crown molding firmly in place.
Once the molding has been attached, you will go back along its length and countersink the nail heads with a punch. Carefully use wood putty to go back and fill in the countersunk holes over the nails. You will also fill in any small cracks or imperfections in the joints of the trim pieces. Once the putty is dry you can sand the area smooth with very fine grain sandpaper. Using touch-up paint or stain, recolor these areas of putty to match the rest of the molding color.
 | Posted in »

0 comments: Responses to “ How to Install Crown Molding ”